Monday, April 30, 2012

Venison

The last time we went to my mother-in-laws, she gave us a frozen package of venison tenderloin. Her brother had given it to her, and she said she wasn't sure how to cook it. Mrblocko loves deer meat and snatched that bad boy up.

He had no idea how to cook it either, but had every confidence in my ability to find out on the internet. Sure enough I found this delicious looking recipe for bacon wrapped venison tenderloin from Food.com. I think deer tastes too gamey, but even this recipe sounded awesome.

So I whipped up the marinade, and opened up the package to find...

it had been cut in medallions.

DOH!

There was no way I could reassemble this enough to wrap it in bacon the way the recipe suggested. We thought about wrapping the individual medallions with bacon, but we agreed that the venison would probably get well done before the bacon was fully cooked. Neither of us is a fan of undercooked bacon, or over cooked tenderloin.

So I put the medallions in the marinade I had prepared. After 8 or so hours, Mrblocko simmered them in a small skillet with the marinade.

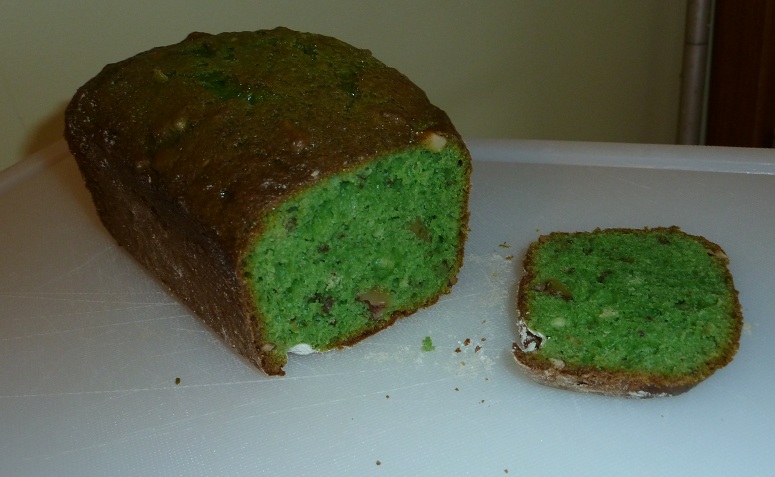
Here's what some of the meat looked like after it was cooked.

Mrblocko and Blockette really liked it, but of course, I thought it tasted gamey. Hopefully, the next time we get our hands on a deer tenderloin it won't be sliced into medallions and we can test this recipe out properly.

Sweet Bacon Wrapped Venison Tenderloin from Food.com
2 lbs venison tenderloins (a single deer loin or Moose or Elk or Pork or Beef)
1/2 lb bacon (Plain, thin-sliced Bacon is best)
3 cups dark brown sugar
2 cups soy sauce (Regular NOT low-sodium. You'll want the saltiness)
1/4 cup white sugar (Optional for added Sweetness)

Mix brown Sugar and Soy sauce together in a bowl. They should combine nicely into a soupy soy liquid. Put Deer Loin in a cooking tray and pour Brown Sugar/Soy Sauce mixture over loin. Roll tenderloin over in mixture, completely covering it. Let meat marinate in mixture at least 3 hours or overnight in fridge.

Remove loin from tray, and place on a slotted bake sheet with a drip pan or aluminum foil below to catch dripping. Don't throw away marinade.

Wrap a piece of bacon around the very end of the tenderloin, securing the bacon strip with a toothpick. Repeat this process until the entire loin is wrapped in ten or so bacon "loops." The tenderloin should look like an arm with a bunch of wrist watches on it, the watches being the bacon strips.

Drizzle remaining marinade over deer loin. You can continue to baste the loin with the marinade throughout the cooking process with either a brush or a turkey baster.

Place on center rack in oven and bake at 350°F for 30-40* minutes. *This should cook the meat to about Medium. For those of you who prefer rare meat, cut the time to 25-30 minutes and then follow with the "OPTION 2" step below regarding searing.

OPTION 1 - with about 10 minutes of cooking time left, you can lightly dust the top of the loin with white sugar. This creates a sweet crust on top of the bacon. Might be too sweet for some. Try doing it on just HALF of the loin to see if you like it!

OPTION 2 - For a crispier crust and crispier bacon, remove Loin from oven and place the Loin(s) directly on a Grill over medium-high heat to sear the bacon and outer loin.

Remove from oven and place on cutting board. Using a knife, cut the loin between each strip of bacon so that you have many pieces of meat, each with their own toothpick.

Saturday, April 28, 2012

More Mini Cross stitches

Here is my next batch of stitched up mini cross stitches. They are all done on the same hand dyed antique white 28 count lugana fabric, with the exception of the last picture. That one is stitched on plain old Antique white lugana.

I saw this design here over at the blog Little Lovelies, but it comes from the book A Rainbow of Stitches which they carry at my lovely local library.  The original was done in two colors but I liked it in just the one.


This is a free chart from from sub rosa called Keys to the Past. It's the companion freebie to Locks and Keys that I wrote about here.


I found the chart for this pretty little lady here via pinterest. The Chart was created by Corinne Leroy Creations.  I changed the colors to fit the basic muted brown color palate of all the mini cross stitches I've been stitching lately.


Finally, this was supposed to originally be a black dress, but again I changed it to a redish maroon, with dusky pink flowers to fit the color palate of the other small stitches I've stitched so far.  The pattern is another freebie from Les douces Heures de Piatine.

And that's it so far!

Friday, April 27, 2012

Seasoned Salts

I might seem a little odd for me to be posting about seasoned salts. I'm usually writing about how to eliminate salt from food and seasoning blends. Sometimes it's nice to use seasoned salts as a dry rub for meats, or for roasted/grilled potatoes.

One day I found two slightly different recipes for seasoned salt blends. I thought it would be fun to give them both a test drive.

The first one I made was seasoned salt from Family Feedbag.
It contained: Garlic powder, paprika, onion powder, white pepper (I broke both of my pepper mills, so white pepper was the only ground pepper I had on hand.) and salt.

The second seasoned salt was Mock Lowrys Seasoned Salt from Group Recipes.
It contained, cornstarch, turmeric, sugar, onion powder, garlic powder, smoked paprika, and of course salt.

Here's what they looked like all blended up:
The Family Feedbag seasoned salt is on the left, and the Lowry's Copycat is on the right.

The Lowry's kept wanting to separate after the initial blending.  I'm guessing this was because of the cornstarch.  Because of this, and the fact that the Lowry's was so much lighter than the first salt blend, I was convinced I would prefer the Family Feedbag version.

Color me surprised, because we all liked the Lowry's better.  Not that the other blend was bad, the Lowry's was just a bit better balanced.  I think it was the sweet from the sugar and the heat from the smoked paprika.

Once I run out of both seasoned salts, I'll most likely make another batch of the Lowry's seasoning.


Seasoned Salt from Family Feedbag
1/4 c salt
1 T onion powder
1 T garlic powder
4 t paprika
1/2 t pepper

Copycat Lowry's from Group Recipes (I doubled this recipe)
2 T salt
2 t sugar
1/2 t smoked paprika
1/4 t turmeric
1/4 t onion powder
1/4 t garlic powder
1/4 t cornstarch

Thursday, April 26, 2012

Thankful Thurs #17

1. No one was home to see how I licked every last bit of Biscoff out of the jar.

2. Blockette scored another goal at her last Soccer game.

3. It was a game that Grandpa was at, so she was even more excited.

4. Mrblocko was nice enough to let me stay home so I didn't freeze off all my appendages.

5. Chocolate Cake.

6. Resisting the urge to buy pizza for dinner on Sun; the fish we had instead was awesome.

7. Mrblocko teaching our God-daughter how to ride a bike.

8. Making time for Blockette to read to me, outside of her school work.

9. Boo snuggling with Blockette and how happy she was about it.


10. I've decided to officially change Boo's name to Boo-ford Aloysuis Poopington III.

Wednesday, April 25, 2012

Thread Catcher

If you do any kind of sewing, or hand work, you know that you get little thread bits everywhere.  These little threads are often refered to as Orts, an archaic word for useless scraps. I usually put my orts on the arm of the couch, then I put my arm there or the cat jumps up and the bits get scattered. All. Over.  Drives me nuts.

Or even worse.  You're stitching with dark thread and you keep looking at the thread bits out of a corner of your eye thinking it's a bug.  Cause you know the one time you don't give it a second look it actually WILL be a bug.  And that bug will GET you. (You know it will.)


 Something needed to be done to stop the madness. 

Once upon a time I used a small ceramic Japanese tea cup to contain the bits, but I was always knocking it over and spilling the contents.  It was a miracle it never shattered.

Maybe now I can use it for actual tea?  Nah.  Way too crazy of a concept for me. More likely I'll keep my marbles in there.  You know, so I don't lose them.

A fabric thread minder seemed like my best bet.  If I dropped it, no big deal.  And as an added bonus, the thread bits would most likely cling to the fabric.

I'd seen these triangle-y pyramid-ish shaped thread catchers on Pinterest, and for the life of me I could not make heads or tails of the tutorial.  I sat there puzzled, scratching my head.  Then, I realized I hadn't taken a shower in four days, or something like that, and that was why my head was so itchy.  So I took a shower.

Once I was all clean and clear headed I did what any sane person would do, look on Google for a better tutorial.  Brilliant.  I found this Thread catcher tutorial from Gingerbread Girl's Quilting Adventures.  The pictures explain everything so well, even I could understand it.

I made two, one to keep at home, and one to keep amongst my travel sewing kit.  I love how they fold flat.  Even stuffed with orts they take up less space than my old jar.


The photo above is for size reference against my freaky big hands, and also to show the bottom of the thread catcher.  What was tripping me up originally was that I thought this was made from 3 triangles instead of one.  A picture of the bottom would have been a big help.  So here you go internet community, a picture of the bottom of the triangle thread catcher. 

I love these little guys.  They were fun to make.  I wanted to make more but I couldn't justify having more than two of them.  I do think they'd be a cool thing to add if you were making a sewing kit as a gift for someone learning how to sew.

Tuesday, April 24, 2012

Pierogi Lasagna

I really like pierogies. Although, it was another one of those things that I hadn't ever heard about until I moved to Illinois. You'd think they'd be a big hit in Minnesota, being all white and potato-y.

I've never attempted to make pierogi before. They seemed a bit complicated. I've not yet mastered the art of noodles, other than opening the box and dumping them into boiling water.  Then I saw this recipe for pierogi lasagna from Omnomicon AND The Cutting Edge of Ordinary.  I can do lasagna, so why not give it a shot.
I mashed up both recipes and came up with a tasty meatless dinner for Lent.  I swear this recipe made a metric ton.  We wound up eating the leftovers all week.  Well, when I say we, I mean Blockette and I.  I couldn't subject Mrblocko to an entire week of no meat for dinner.

After one day of leftovers he came home and said, "Do you know that commercial for Fiber One snack bars, where the husband says, 'Fiber makes me sad?'  Well that's me, but with meat." 

That made me chuckle, so I found something else for him to eat.

By the end of the week Blockette and I were totally sick of this dish.  I think once we finished the last of it I actually said, "Hooray!"

Don't mistake me.  This was a really tasty dish.  It's just too much leftovers for our tiny family. Next year, if I make this for Lent, I'll just half the recipe.


Pierogi Lasagna adapted from Omnomicon and The Cutting Edge of Ordinary
9 lasagna noodles
3-4 lbs potatoes (I used russet) to get about 6c mashed potatoes
1/4c sour cream (I used low fat)
1/2 c milk
1 1/2 c shredded cheddar cheese
salt and pepper to taste
4T butter or olive oil
5 medium onions, finely chopped


Bechemel Sauce
3 c milk
4T butter
1/4 c flour
1 t kosher salt
pepper to taste
pinch of nutmeg

Preheat oven to 350F.  In a 9x13 dish, place noodles.  Cover with boiling water and let sit for 15-20 min.

Meanwhile, peel, dice and boil potatoes.  When potatoes are fork tender, mash.  Add sour cream, milk, salt, pepper and cheese.  Drain the noodles.  Spray the 9x13 pan with cooking spray and set aside.

While the potatoes are cooking: chop and saute the onions in butter/oil until light golden brown.  Fold into mashed potatoes.

Prepare the bechemel: Pour milk into a saucepan on medium heat and bring just to a boil.  Remove from heat.  (I poured the milk back into the glass measuring cup.)  Melt butter in the same sauce pan over medium heat.  Whisk in flour.  Stir constantly for 2 minutes.  Slowly add hot milk in driblets, whisking constantly.  Cook 10-13 min, stirring occasionally, until sauce is thick enough to coat the back of a wooden spoon.  Season with salt, pepper and nutmeg.

Cover the bottom of the pan with a layer of sauce.  Then layer 3 noodles,  and a third of the potatoes.  repeat two more times and end with a layer of bechemel sauce.  Cover with foil and bake for 25-30 minutes.

Monday, April 23, 2012

Cornmeal Crusted Tilapia with Tartar Sauce

I guess a lot of people like to fry fish in cornmeal. Not being all that into fish, I didn't have a clue. This recipe for cornmeal crusted tilapia from The Boho Birdie is a slightly more healthy version as it is baked instead of fried.
Not being all gung ho about fish in the first place, I took a bite and didn't think this recipe was any better or worse than your average fish recipe.  Mrblocko and Blockette loved it, but then again, they both really like fish in general.

Then I tried some with some Tartar Sauce.  Oh. My. Word.  I could just eat the tartar sauce by itself.  It's that good. SERIOUSLY.
I've only ever had the stuff from a jar before.  That stuff is total and utter garbage.  I didn't even know it was garbage until I tried this tartar sauce.  It is the BEST TARTAR SAUCE in the world.

Yes, yes.  I know.  A lot of bloggers say that about the things that they make, but I swear, this really is the best tartar sauce.  Mrblocko doesn't even like tartar sauce, and do you know what he said about this tartar sauce-mana-from-heaven?   "It kicks all the other tartar sauces' butts"

It really truly does.

One more quick thing before you get to the recipe, we halved the breading as I used 3 thin tilapia fillets from the freezer section.  The fillets in the original recipe are nice and thick, like the kind you might buy fresh from the fish counter.  So unless you are using the thick fresh stuff, half the amount of breading called for in the recipe below.

Also, we didn't have any Old Bay.  Instead we used Bavarian seasoning from Penzeys Spices.  It had bay in it, so I thought it would be a good swap.  The thing was, we could barely taste the seasonings.  Next time we will double the amount of spices

Cornmeal-Crusted Tilapia with Mom Pat’s Tartar Sauce from The Boho Birdie
for the fish:
2 thick tilapia fillets, cut into pieces (cod or sole would work well here, too)
1 c. flour (I used all purpose)
1 c. cornmeal
2 eggs, beaten or 1 c. egg beaters
2 tbsp old bay seasoning, divided, plus more for sprinkling (I used Bavarian Seasoning)
1 tsp garlic powder
salt and pepper

preheat oven to 350 F.

Set up an assembly line with 3 bowls for breading the fish. In the first bowl, combine the flour, 1 T old bay seasoning, salt, and pepper, in the second, eggs, and in the third, cornmeal with 1 T old bay and garlic powder.

Cut tilapia into pieces (if needed) and spray a baking sheet with nonstick cooking spray.

Dredge tilapia pieces in flour first, egg second, and cornmeal third. Use one hand to coat the fish in the flour and cornmeal and the other hand to coat the fish in the egg. Ensure all sides of the fish are coated in each mixture before moving on to the next. Sprinkle with more old bay.

Place the breaded fish on the greased cookie sheet (or, you could place the fish on a wire rack on a cookie sheet and not have to flip it during cooking). Mist the fish with more spray if you like, this will create more browning during the baking. Cook the fish for approx 15 minutes, or until the fish flakes easily with a fork.

Mom Pat’s Tartar Sauce
1/2 c. mayonnaise (I used the kind with olive oil)
1 tsp minced onion (I used onion powder)
1 tsp pickle or lemon juice (I used a tsp of each)
1 tsp pickle relish (we use dill pickle relish)
1 tsp. olives (optional) (We were out of olive so I used another tsp of relish)
Cayenne pepper or paprika to taste and add color

Combine all ingredients in a bowl and drown yourself it it's goodness.

Friday, April 20, 2012

Ham with Maple and Mustard Glaze

Ham. Nothing beats a good ham. We're experts on ham in this house.
 This is just a representation of what 90% of the pictures of my beloved child look like.

But we aren't talking about that kind of ham.  We're talking about bone-in ham shanks.  Over Easter they were on sale for 89¢ a pound.  I bought two and stuck one in the freezer for later.  I would have bought more but they were standing at the door with clubs if you tried to buy more than two.  I probably could have taken them on, but I left my cast iron skillet at home.  Alas.

The last ham my husband prepared was tasty, but as we rarely eat the same thing twice, I had to go searching for a new recipe. I settled on this recipe for ham with maple and mustard glaze from Cook, Shoot, Eat.

Mrblocko and his knives of fury, carving up the ham like a maniac, maniac-woah-oh-oh.
Of course, not one to want to let anyone down, I made a few minor changes to the recipe.  The recipe called for champagne vinegar.  Well I didn't have that, but I did have white wine vinegar.   I thought that would work out just as well.  Except for the fact that when I went to use it, I noticed it had this huge floating disk of yuck in it.  I didn't know that vinegar could grow funky junk.  Guess you learn something new every day.

I decided to use cider vinegar.  Cider is made from apples, and apples are a nice complementary flavor to ham.  And, as it turns out, I had EXACTLY the right amount for the recipe.

Instead of using Apricot jam, I used peach-mango preserves.  Wow.  Awesome substitution.  I've made a peach glazed roaster chicken before that was to die for.  Peach-mango kicks regular peach's butt.  Of course, I might just be a tad bit biased as I LOVE peach-mango stuff.

Oh, one more thing, we left off the cloves.  Neither Mrblocko nor I particularly care for cloved ham.  The ham had plenty of flavors going on, that even if you were a clove fan, I don't think you'd miss them.

This ham was super moist.  I can't stand it when a ham gets over cooked.  It's so sad to see the tender goodies turned into pork chewing gum.  Bleck.  Sometimes glazes can be über sweet, but not this one. This glaze had a nice balance of flavors.  It was salty from the mustard, sweet from the maple and jam, and tangy from the vinegar and mustard. An all around winner.

Ham with Maple and Mustard Glaze adapted from Cook, Shoot, Eat
ready-to-eat, cooked ham, bone-in, uncut (not spiral cut), shank or butt end, 8-11 lbs.

Glaze
 ½ cup cider vinegar
¾ cup maple syrup
½ cup Dijon or spicy mustard
2 T peach  mango preserves
Salt and pepper to taste

Remove ham from the refrigerator still in its wrapping a couple of hours before you’re planning to cook so as to bring it close to room temperature.

Make a diamond pattern on the ham by cutting straight lines into the fat with a sharp knife about ½ inch deep parallel to each other. Score another set of lines at a 45 degree angle to the first to create a diamond pattern.

Preheat oven to 325° F. Place ham, fat side up in a roasting pan lined with aluminum foil. Cook ham in oven for one hour.

While ham is cooking, make glaze. In a small saucepan, heat vinegar over medium heat until reduced to 2 T.  Add maple syrup, mustard, jam and salt. Cook, whisking, until well combined, about 2 minutes. Season with pepper to taste and set aside.  Remove ham from oven and brush top and sides generously with one third of the glaze.

Return to oven. Remember that the ham is already cooked so you don’t have to cook to an internal temperature of 140° F as is often instructed. The ham will need about another 30 min of cooking to achieve an inner temperature between 110° and 120° F. It will be very warm, if not hot, and is more likely to retain its moisture.

Baste every ten minutes with the glaze. Don’t baste ham with its own juices as the glaze might wash off. Take the ham out of the oven, cover with aluminum foil and let rest 15 minutes before serving.

Thursday, April 19, 2012

Thankful Thurs #16

1. Mrblocko agreed to take Blockette to Soccer practice so I wouldn't have to freeze.

2. It was a nice day for the actual game.

3. Grilling season is upon us.

4. The roses at the library are blooming.

5. I've sucked Mrblocko into watching Downton Abbey with me...and he seems to enjoy it.

6. Mrblocko is an excellent dish washer.

7. Hand me downs.

8. Advil.

9. Getting the knot in that aweful strechy cord to stay knotted when I fixed a little girl's bracelet at church.

10. The wind seems to have calmed down.

Wednesday, April 18, 2012

Easter Meringues

I don't know why it is, but we have no Easter traditions in our family. Oh sure, the Easter bunny visits, and we cook up a ham, but that's it. I thought that was particularly odd considering all the little quirky things we do for Christmas.  It's even more odd, when you think about it, that if there was no Easter (I'm referring to the Christian holiday, not Ostara), there'd be no Christmas.

Anyhow, when I saw this fun recipe for meringues over at the blog Mommy's Idea Cookbook, I thought it would be a fun thing for all three of us to do together as a family, and possibly start a new Easter tradition.  This recipe incorporates Scripture into the baking steps, each relating to the death and resurrection of Jesus.

Even though we were all exhausted from all the yard work we'd done during the day on Saturday, and we were getting up for the 6AM service on Easter Sunday, we made these Easter meringues right after dinner.
Goldfish crackers optional
I'd never made meringue cookies before, and with last year's Resurrection Roll Flop, I was a bit worried they wouldn't turn out as planned.
But they did!  The centers were hollow like they were supposed to be!  And they tasted light as air.

Mrblocko thought the cookies were too sweet, but Blockette and I loved them.  I plan on making these again next year!


Easter Meringues from Mommy's Idea Book
1 c. whole pecans
1 tsp. vinegar
3 egg whites
pinch salt
1 c. sugar
zipper baggie
wooden spoon
tape
Bible

Preheat Oven to 300 F. (Note: Do this first, don’t wait until you are half way done with the recipe!) Place pecans in Ziploc bag and let your children beat them with the wooden spoon to break into small pieces.

Explain that after Jesus was arrested he was beaten by the Roman soldiers.

Read John 19:1-3.

Let each child smell the vinegar. Put 1 tsp. vinegar into mixing bowl.

Explain that when Jesus was thirsty on the cross he was given vinegar to drink.

Read John 19:28-30.

Add egg whites to vinegar. Eggs represent life.

Explain that Jesus gave His life to give us life.

Read John 10:10-11.

Sprinkle a little salt into each child’s hand. Let them taste it and brush the rest into the bowl.

Explain that this represents the salty tears shed by Jesus’ followers, and the bitterness of our own sin.

Read Luke 23:27.

So far the ingredients are not very appetizing. Add 1 c. sugar.

Explain that the sweetest part of the story is that Jesus died because He loves us, He wants us to know that and He wants us to love Him as well.

Read Psalms 34:8 and John 3:16.

Beat with a mixer on high speed for 12 to 15 minutes until stiff peaks are formed.

Explain that the color white represents the purity in God’s eyes of those whose sins have been cleansed by Jesus.

Read Isaiah 1:18 and John 3:1-3

Fold in broken nuts. Drop by teaspoons onto wax paper covered cookie sheet.

Explain that each mound represents the rocky tomb where Jesus’ body was laid.

Read Matthew 27:57-60.

Put the cookie sheet in the oven, close the door and turn the oven OFF. Give each child a piece of tape and seal the oven door.

Explain that Jesus’ tomb was sealed.

Read Matthew 27:65-66.

IT”S TIME TO GO TO BED!

Explain that they may feel sad to leave the cookies in the oven overnight. Jesus’ followers were in despair when the tomb was sealed.

Read John 16:20 and 22.

On Sunday morning, open the oven and give everyone a cookie. Notice the cracked surface and take a bite. The cookies are hollow! On Resurrection morning, Jesus’ followers were amazed to find the tomb open and empty.

Read Matthew 28:1-9.

THE LORD JESUS HAS RISEN!!! HE IS ALIVE!! (...yup.)

Tuesday, April 17, 2012

Kushari

I had never heard of Kushari before, but stumbled upon it when I was looking for meat free recipes to make over Lent. Kushari (or Koshary, kosheri, or koshari) is a popular dish in Egypt made from rice, noodles, lentils and sometimes chickpeas.
The recipe I used for kushari was from the blog Whats 4 Eats.

I really enjoyed this dish, although it did make quite a lot and I was glad when the leftovers were over.  The recipe does take up all 4 burners, with cooking the rice, noodles, lentils and onions, so that was a bit of juggling that I was not used to. I was pretty proud of myself that I managed to time the cooking so that everything was ready at the same time.

The recipe says to cook the lentils for 30-45 minutes and the directions on the lentil bag said that they only needed to be cooked for 20 minutes.  I figured overcooked lentils would be better than undercooked ones, so I cooked them for 45 minutes.  Mrblocko and I both thought that the texture was a little more al dente that it should be, so next time I'll cook the lentils for a full hour.

I'd also double the sauce and onions for topping.  I wished there was more of both.  I might try adding garbanzo beans next time too.  If I make this for dinner, not for Friday over Lent, I'll add a few diced chicken breasts to the mix as well.

Kushari slightly modified from Whats 4 Eats
1c uncooked Rice (I used medium grain)
1 c uncooked Macaroni pasta (ditalini would be great too)
1 c uncooked Lentils
1 bay leaf
2  T olive oil
1 Onion, chopped finely (increase this to 2 next time)
2 cloves minced Garlic (increase to 4-5 cloves next time)
1 15 oz can of fire roasted tomatoes (use 2 cans next time)
1/2-1 t Pepper flakes
1 t cinnamon
1 t cumin
Salt and pepper -- to taste
Oil for frying
2 Onion, sliced thinly into half moons

Start with the lentils.  Simmer lentils in 2 c water with the bay leaf (don't forget to remove the bay leaf after the lentils have finished cooking!), covered for 45-60 min until tender.

About a half hour into the lentil cooking time, cook the rice in 2 c water, covered for 20 min until done.  Also boil the water for the pasta and prepare per the package directions. 

Heat about 1/2-inch of oil in a heavy skillet. Add the sliced onions and fry until they turn brown and crispy. Drain on paper towels.(I started this at the same time as the lentils, and once the onions were cooked I started preparing the sauce.)

While the rice, pasta and lentils are cooking, heat the olive oil in a sauté pan over medium-high heat. Add the chopped onions and garlic. sauté until the onions are translucent and wilted, 4-5 minutes. Stir in the tomato sauce,pepper flakes, cinnamon and cumin, reduce heat to medium-low and simmer for 10-15 minutes, add a little water if necessary. Season with salt and pepper and set aside.

Place the rice, macaroni and lentils in a large bowl, season with salt and pepper and stir together gently with a fork. Portion the mixture into individual bowls and spoon some tomato sauce over each portion. Top with crispy fried onions and serve hot or at room temperature.

Monday, April 16, 2012

5 Minute Mac n Cheese

Today's recipe has been brought to you by another day of lunch boredom.  A few weeks ago I wrote about the 10 minute baked potato.  But what if you don't have any potatoes?  Or, more likely, you are so hungry lazy you don't want to spend even 10 minutes making yourself lunch.

If that describes you to a "T" then the 5 minute macaroni and cheese from Picky Palate is right up your alley.

I only had a single cup of cooked leftover noodles in the fridge, so I cut the recipe in half.  As I had a reduced amount of ingredients, I scaled back on the cooking time as well. (2 minutes and then 1 and a half minutes.)

My plastic wrap wouldn't seal properly on the bowl so the liquid sort of exploded in the microwave.  That wasn't so fun.  Next time I make this I will use a bigger bowl.

The first time I took the macaroni out of the microwave I had a bit of a shock.  There was a lot of liquid in that bowl.  So I stirred it and nuked it for the second round, and crossed my fingers.  I probably should have put a new sheet of plastic wrap on the bowl, because it was this second wave of microwaving that made the mess.  Aside from the mess, the liquid went down to a normal level for mac n cheese.

I had a bit of clumping with the cheese.  I happen to love cheese, so this wasn't an issue for me.  I'm not sure if the clumping was due to using too much cheese, or the fact that I used the pre-shredded stuff from a bag.

Overall, this was a good speedy lunch.  I'll have to experiment a bit more to get the recipe to turn out just how I like it, but I feel it is worth the time to tinker with.

Five minute macaroni and cheese from Picky Palate
1/2 pound cooked pasta of choice
2 cups shredded cheddar cheese
1 cup whole milk
3/4 teaspoon kosher salt
1/2 teaspoon freshly ground black pepper

Place pasta, cheese, milk, salt and pepper into a large microwave safe bowl. Stir to mix. Cover lightly with plastic wrap and microwave for 3 minutes. Stir and microwave for an additional 2 minutes. Stir until creamy and smooth. Serve immediately.

Makes 4 servings

Sunday, April 15, 2012

En Garde

Get it? En garde. Fencing. And this post is about our fence.

Good one. Right?

I'll give you a moment to collect yourself from that knee slapper.

So our fence is now officially finished. It's nothing fancy, but it's not going to fall over if you sneeze or even think about looking at it.

Before: Left side

You'll notice half the fence has rotted away.  Very classy looking.

After: Left side

Ta DA! Now we have a big almost 6ft wide gate on this side.  This gate is so big I can barely open and close it.  It's nice to have a wide gate.  You never know when you might need it. 

 Too bad half the giant lilies got trampled on.  If they come up next year,  I'll have to find a place to transplant them. 

Before: Right side

This side wasn't nearly as bad as the other one.  But the gate was just awful.  The door was too low to the ground, so in the winter the door would freeze itself into the mud.  It also had no latch.  And no handle.  The wood was so rotted that it would fall off after a few uses.  Last year I got tired of reattaching it so I just left it off.

After: Right side

The new gate opens the other way, I'm not sure why. Builder's choice I guess. Now it has a handle, and here's the cool part, the gates can only be locked and unlocked from the inside. Seems more secure this way to me.

I didn't take a picture of the back because the guys who put it up came over and had it down before I realized I should snap some pics.  You'll have to take my word that it was pretty rotten, visually and literally.  I mean one of our neighbor's tree's had grown into the fence.  That doesn't do much for the structural integrity of the fence.

It's nice to actually have privacy.  Before you could totally see the neighbors through the rotted gaps in the fence.

The fence is far from perfect, and a few people asked if we were going to paint it.  I like it the natural light color.  Sealing it only darkened it minimally.   I'm sure it will get darker with age, but I'm going to enjoy it the way it is for now.  The backyard seems so much brighter than it did before.  I guess getting rid of a huge grey run down mess will do that!

Saturday, April 14, 2012

It's the middle of April!!

Those of you in more warmer temperate climates won't understand why I'm so jazzed about the fact that it is mid April. Usually the daffodils are just starting to bloom. They are long gone, and so are all but the late blooming tulips.


I think this tulip looks sort of like a peony if you squint.  I just love the little hint of pink.

Speaking of pink...My bleeding heart bush is blooming nicely too.


Every year I"m convinced that I've killed it.  It's in a mostly shady part of our yard, so it usually doesn't do well.  As the plant has had a lot of warm days before the trees have gotten their leaves, it's got more than it's usual share of sunlight.  Dare I hope for a second bloom from this little guy.

And most amazing of all...


I noticed that my strawberry plants have started to flower!!!!  Crazy!!!!  Maybe I'll actually get some strawberries this year!

Sparkly Silver

I thought this was just so cool that I had to share. I found these directions on how to remove tarnish from silver jewelery over at Stuff Grandma Made.

I'm pretty skeptical about these supposed miracle home remedies, but I figured, if it didn't work, or ruined my jewelery, it was stuff I wasn't wearing anyhow because the tarnish made them so ugly. 
Before cleaning
Now I was only 100% certain that two of the items, the calla lily earrings and the leaf ring, were actually silver, and not silver plate.  I was pretty sure that the star ring and the twisty earrings were plated, but might not even be silver plated.

The original directions do state not to use this method on items that are silver plated, as it could damage the metal underneath.  But, as I explained earlier, I wasn't wearing any of these things anyhow because they were so tarnished.  I felt I had nothing to lose.
After cleaning

Woah! Look how shiny they are! I can't believe it worked so well.

Want to know how I did it? 

Take a piece of foil and line a heat resistant bowl or dish.  Combine 2-3 teaspoons each of table salt and baking soda with enough boiling water to cover your jewelery.  The jewelery should be touching the foil and each other.  Then you let it soak for 5 minutes.  Polish with a towel to get them to shine.

I did have to let the twisty earrings soak for an additional 5 minutes because they were so horribly tarnished.  And for some reason there was a mild stink of sulfur for the 5 minutes the jewelery was soaking.  That was really odd, but the odor did subsided so I'm just going to chalk it up to one of those weird things.  The jewelery seems fine so who really cares.

I'm just so happy to be able to wear these pieces again!

Friday, April 13, 2012

Snickerdoodle Brownies

I made these snickerdoodle brownies, from A Well Seasoned Life, to bring over to my mother-in-law's house over spring break.


Feel free to be amazed with my special food photography props.  I'm super classy, and should be a professional food photographer.

Now that you are done laughing, let's get on with discussing these Snickerdoodle Brownies.

First, they had a glaze on top, but they were not pretty with the glaze.  So that's why you get the crazy cat medicine picture.  Cause cat medicine and Kool-aid were prettier than the glazed bars.

The bars settled in the middle as they cooled, which acted as a basin for the glaze to settle in.  A smart thing would have been to let the glaze set up a bit before I drizzled it on.  Do that so you don't get a glaze swimming pool.  Glaze swimming pools taste divine, but are butt ugly. (Case in point, see this post.  When will I ever learn?!)  Or even better yet, cut your bars and then apply the glaze.  This wasn't really an option for me.  I wanted an easy way to transport these bars in the car, so I left them in the pan I baked them in.

Cinnamon is like crack to me.  And these bars are really cinnamon-y.  I could NOT stop eating them.  I may or may not have eaten so many bars in one sitting that I may have started buzzing around the room like a humming bird, and then just might have had to lie down and have a sugar crash nap.  But I'm not going to fully admit to that.

I'll definitely make these bars again.  Although, if I'm just making them for the three of us, I'll make a half batch so I don't pig out again and knock myself into a sugar coma. 

Snickerdoodle Brownies from A Well Seasoned Life
2 1/3 cup All-Purpose Flour
1 1/4 teaspoons baking powder
1/2 teaspoon salt
3/4 cup butter, softened
1 1/4 cups granulated sugar
1/2 cup packed brown sugar
3 eggs
1 teaspoon vanilla

Cinnamon Mixer:
1 Tablespoon sugar
1 Tablespoon Cinnamon

Icing:
1 cup powdered sugar
2 tablespoons milk
1/4 teaspoon vanilla

Preheat oven to 350 F. Spray 9x13 baking pan with cooking spray. In small bowl combine flour, baking powder and salt. Set aside. In a larger bowl mix together softened butter, brown sugar and sugar until blended. Add one egg at a time, then vanilla. Add flour mixture and blend well. Spoon half of the batter into the pan and spread evenly.

Make cinnamon mixture by combining: 1 T sugar and 1T cinnamon. Sprinkle evenly on top of the batter that is in the pan. Using the remaining batter, place teaspoon sized dollops on top of the cinnamon mixture…covering all the pan. You will be able to see some of the cinnamon mixture peeking through. Bake for 25 minutes.

Once baked, let it cool for one hour. Combine all ingredients for the icing and once cool drizzle it over the brownies.

Thursday, April 12, 2012

Thankful Thurs #15

1. Only verbal punches were thrown when the neighbor behind us decided to get all racist toward our other neighbors who were sealing our new fence.

2. Sunrise Easter service.

3. Blockette singing her heart out at church.

4. Another awesome report card from Blockette.

5. I finished sealing the rest of the fence myself.

6. I won't have to do that again for a while.

7. I can finally move like a normal person again.

8. The talk I had with another neighbor, not the ones mentioned above. (More on this in a few weeks.)

9. Mrblocko taking my computer in for repairs before it gave up the magic smoke.

10. The computer is still under warranty.

11. The free loaner computer is so quiet I can actually hear myself think.

12. Downton Abbey...it's as good as everyone raves about.

Wednesday, April 11, 2012

No Boil Penne and Cheesey Bread

Are you one of those folks who doesn't boil their noodles when they make lasagna?  If you are, you is my kinda people, if you aren't why the frell not?!  The noodles totally get cooked in the oven.  Save yourself some time people!

Ahem.

But we're not talking about lasagna today. No sir. We are talking about it's cousin, no boil penne from Plain Chicken.  Yes.  You read that right.  NO BOIL.  It's a pasta revolution!

A time saving revolution.  Just dump everything into your casserole dish and wham...awesome!

Now I feel it is my duty to the world to explain a few things. First, your Penne dish will look like this when it comes out of the oven:

It will look very liquidy, and oh, the bubbles.  Mine came out a boiling cauldron of molten red lava.  Please wait 15-20 minutes before serving.  Your family and their non burnt tongues will thank you.

This is what the dish looks like after things have cooled off a bit:
Much better.

And since I can't serve Italian food without bread, (it's the law you know, ) I made some cheesey bread too.

I found two nearly identical recipes for cheesy bread.  One was pizza blanco from Everybody Likes Sandwiches and the other was cheesy breadsticks from Real Mom Kitchen.  The only real difference is one gets baked at 500 for 10 minutes, and the other at 400 for 20 minutes.

Before the oven!

And Post baking goodness:


The cheesy bread made the perfect side dish to the no boil penne. Blockette went totally gaga over both of them. Particularly the cheese bread. This is one of the things that makes me know she truly my child...her love of cheese. Girl cannot get herself enough cheese, especially Parmesan, but that's a whole 'nother story.

One more thing, the cheesy bread recipe makes enough for two crusts. I didn't want two whole pizza thingies. I guessed, and correctly, that the bread would be it's most awesome right out of the oven. So I took the unused half of bread dough and put it in a non airtight container in the fridge. It's important that your container is NOT airtight. You want the dough to be able to breathe a bit in there!

So I let my dough sit in the fridge for two days, when we were having the no boil penne leftovers. My intentions were to let the leftover dough sit out for an hour before making it. Nope. I totally spaced out. At 5:00 I yelped, "Oh no! I forgot to take the bread out." (This was particularly confusing to my friend who I was on the phone with at the time and it didn't quite make since with the flow of our conversation.)

Anyhow, I rolled that dough out, popped it in the oven and hoped for the best. Well wouldn't you know it, it was the best. Turned out every bit as yummy as it's fresh twin.


No Boil Baked Penne from Plain Chicken
1 jar pasta sauce (26oz)
1 1/2 cups water
15 oz ricotta (I used small curd cottage cheese)
2 cups shredded mozzarella, divided
1/4 cup parmesan cheese
1 lb sausage, cooked and crumbled
8 oz uncooked penne (This is half a box)

Preheat oven to 400 F. Lightly grease 9x13 pan; set aside. Combine sauce, water, ricotta 1 c mozzarella, sausage, parmesan and penne. Pour into 9x13 pan and cover with foil. Bake 55 min. Remove foil and top with remaining mozzarella cheese. Bake 5-10 min, til bubbly.  Let cook for 15-20 min.


Cheesy Garlic Breadsticks from Real Mom Kitchen
1/2 recipe Basic Pizza Dough (see below)
2 tablespoons softened butter
2 cloves garlic, crushed
1/4 cup grated parmesan cheese
2 cups grated mozzarella cheese
dried parsley, optional

Preheat oven to 500 F.  In small bowl, mix butter and garlic, set aside.  Roll dough out into a 12" circle on parchment paper. Spread butter and garlic mix over dough. Sprinkle with parmesan followed by mozzarella cheeses. Transfer parchment and dough to pizza stone or baking sheet. Bake 9-10 min.
Use a pizza cutter and cut into stick shapes. Sprinkle with a little dried parsley if desired.


Basic Pizza Dough from Real Mom Kitchen (makes two crusts)
1 cup warm water
2 1/4 teaspoons active dry yeast
1 tablespoon honey or sugar
2 teaspoons salt
2 tablespoons olive
2-3 cups bread flour

In bowl of stand mixer, add yeast, honey, and warm water. Give it a stir and let sit for 5-10 min til bubbly and foamy.  Add salt, oil and 1 1/2 c flour. Mix using dough hook.  Once combined, add additional flour 1/2 c at a time til slightly tacky, but doesn’t stick to hands.  Turn on medium to knead for 6 min. The side of bowl should be clean and dough should be smooth.  Remove dough from bowl. Spray bowl with Pam. Add dough back to bowl and turn once to get both sides coated with  spray.
Cover with plastic wrap and allow to rise in a warm place for 1-2 hrs.  Divide dough in half. Roll each half out into a 12 inch circle on a piece of parchment paper. Top as desired.

P.S. This post was written on 3 hours of sleep. I hope you enjoyed your journey down the madness of my sleep deprived brain. Thanks for visiting!

Tuesday, April 10, 2012

Green Bread

AAAAh!!! My bread is all moldy and green!

No, wait! It's just green pistachio bread from Better than Burgers.

This recipe uses pistachio pudding and cake mix, which makes it super easy, and super tasty.  I of course, had to make at least one substitution.  I didn't have any yellow cake mix, so I used butter cake mix instead.  I mean they are both yellow so they MUST be interchangeable.  I mean it's not like I'm using tomatoes for apples or anything CRAZY like that.

The sweet bread turned out just fine, despite my substitution.  The only real problem I had with this recipe was that it does not state what size loaf pan to use.  I must have a larger loaf pan than the folks at Better than Burgers.  When I put half the batter into one loaf pan, it didn't even fill up the pan half way.  The loaves on Better than Burgers have a nice domed top.  I was skeptical that a quick bread would rise more than half way up the pan, so I went to plan B.  I scraped out the batter in my regular loaf pans, and poured it into 4 mini loaf pans.  

Problem solved.  

The batter filled the mini loaf pans about 3/4 full.  That seemed just right to me.

We ate two of the mini loaves over the course of St. Patrick's day weekend, and I froze the other two.  They tasted just as good fresh as they did thawed from the freezer.


Pistachio St. Patrick's Day Bread from Better than Burgers
1 yellow cake mix
4 eggs
1/4 c. oil
2 T. water
1 (3 oz) pkg. instant pistachio pudding mix
1 c. sour cream
1/2-1 t. green food coloring
1 t. almond extract
3/4 c. chopped walnuts

Preheat oven to 350 F. Grease and flour 2 loaf pans (or 4 mini loaves). Mix all ingredients together until well blended. Pour into prepared pans. Bake for 40-45 minutes. Cool 10 minutes before removing from pans.

Monday, April 9, 2012

The Big OH THREE!

This weekend Tomatoes for Apples turned three years old!

Image source: Think Cards
Three years.  It seems like I've been writing on here for a lot longer.  I think that's a good thing.  This blog has given me a place to vent, appreciate the things I have, a place for sharing photos of Blockette with family, and the excuse to continuously try new things in the kitchen.  

If it weren't for this blog, we'd probably be eating the same meals every week.  Which, when you rarely go out to eat, can get pretty boring, pretty fast.  Although, learning my way around the kitchen did result in an unexpected side effect.  Now, when we do go out to eat, most of the time I think, "I could make this better and cheaper at home!"

Don't get me wrong, I'm not this Iron Chief guru, not even close.  My cooking has just improved so drastically in the past three years it's something to really be proud about.  I still have loads to learn and I look forward overcoming more culinary hurdles in the future.

Incidentally, I had every intention of making a cake this weekend in celebration of my blogiversary.  I bought all the ingredients and everything.  Then, I realized we would be overloaded with sugar from the Easter Bunny.  My father-in-law is supposed to come out to see Blockette's soccer game in two weeks, so I thought I'd just delay the cake making until then. 

Happy Birthday little blogy blog!

Sunday, April 8, 2012

Friday, April 6, 2012

Cross Stitch Bonanza

...or what I did over spring break.  ...or whatup smalls?

I've been really getting back into the groove of cross stitching these past few weeks.  I used to be a fanatic before Blockette was born.  Insane about cross stitch.

I made things like this:

Peacock Tapestry by TW Designworks. This bad boy is 22.5"x 14.5" not including the mat or frame.
And this:
Pattern from some book I found in the library back in the early 1990's.  Stitched over 1 on 25 count fabric.

I really don't have the patience or inclination to do massive projects like this anymore.  Which is probably a good thing as the house we live in now doesn't have a lot of wall space.

Anyhow...
Over spring break I stitched up a series of itty bitty cross stitches.  I felt like I accomplished something with every finish, even though I have no idea what I'm going to do with all of them.

The first one: Santa pirate.  Will probably be turned into a Christmas ornament.  It was a free design from Sue Hillis Cross Stitch that can be found here.  It was stitched on a tiny scrap of hand dyed 32 count turquoise linen.  The design measures 2.25"x 2.25".


This little design measures 2"x3".  I found the design on pinterest and it reminded me of Jane Austen.  The design is free and can be found here at a French blog called Aurelle.  The design was stitched over two threads on 28 count white-ish evenweave fabric.


This Grecian lady was another freebie found on the Dutch blog Steekjes and Kruisjes. She was stitched on an off white linen, and measures 2.75"x 2.75".

This key was stitched over two threads on a grayish-green linen fabric. The free chart can be found here on this French Blog.  The design measures 2"x3.75".

This sweet strawberry chart was a freebie from Cosmic Handmade. You can find it here.  I used a scrap of heathered 18 count aida from when I stitched up this cow for my mom two years ago.  The design measures about 3"x3".

You can't really tell from the photo but I used some hand over-dyed threads.  Over-dyed threads are the threads that are dyed multiple colors, often in the same shade, on the same skein of thread.  This is probably the only design that I stitched over spring break that I was less than thrilled about.  The colors are too muted for my liking.  I think perhaps the birds should have been a dusty blue.  I guess I just didn't care enough to rip it out.  Maybe I will later.


Then I decided to get all kinds of crazy.  And dye my own fabric. CRAZY!

I had a narrow strip of antique white evenweave fabric.  It was a bit too creamy for my liking.  I had some Roobios tea that I didn't particularly care for so I used that to stain the cloth. 

I'm quite pleased with the results.

So far I have stitched two tiny designs on my hand dyed fabric.  The first is this locks and keys from the Hungarian blog Sub Rosa.  The link for the free chart is here.  I stitched the design over one thread, so the whole design only measures 2" x 3.75".  There is a companion free chart to this design at Sub Rosa that I just discovered called Keys to the past that I plan on stitching up in the near future.

This cow was my last finish over spring break.  He measures in at a whopping 2"x1.25"! 
Ain't he a cutie.  I think I could handle a cow this size.  At least I could if he could be paper or litter trained!  You can purchase this design on Etsy from Sewingseed.

So that's all that I stitched last week. They're no Peacock Tapestry, but I sure had fun cranking them out!